Quick Start
Get productive in under 5 minutes.
TL;DR – Fast Path
- Drag the above button into Blender and run through the prompts.
- Enable TrueVAULT in
Edit > Preferences > Get ExtensionsorEdit > Preferences > Add-ons. - Sign in / Sign Up through the addon Preferences or side panel (N key →
TrueVAULTtab). - Link SuperHive Purchases https://api.true-vfx.xyz/
- Search, purchase (if needed), Import.
- Done – asset appears in your scene / materials list.
At a Glance
-
Install
Drag & drop or manual ZIP install.
Steps -
Open Panel
Sidebar N → TrueVAULT tab.
Panel -
Sign In
Authenticate / verify email / MFA.
Auth -
Browse & Details
Search, filter, open product pages.
Browse -
Purchase
Use credits or redeem code.
Purchase -
Import & Verify
Download, place, confirm result.
Import
1. Install the Add-on
Choose a method below.
- Drag the blue button above into the Blender window.
- Accept the install prompt.
- We recommend enabling "Check for Updates on Startup", but it is not required.
- You can also tell Blender where to put the addon using the "Custom Directory" toggle and path input field.
- We do not require an access token for this repository.
- Enable TrueVAULT in either the
Edit > Preferences > Get ExtensionsorEdit > Preferences > Add-ons. - Sign in / Sign Up through the addon preferences or the side panel (N key) →
TrueVAULTtab. - Link SuperHive Purchases https://api.true-vfx.xyz/
- This allows access to your purchased assets made through SuperHive.
- Only assets are available for linking at this time. Addon purchases will come in the future.
- Search, purchase (if needed), Import.
- Done – asset appears in your scene / materials list.
- Open Preferences (CTRL + ,)
- Go to the
Get Extensionstab. - Open the
Repositoriesdropdown in the top left. - Click the + button then "Add Remote Repository".
- Enter the repository URL:
https://vault.true-vfx.xyz/functions/v1/get-repo.- We recommend enabling "Check for Updates on Startup", but it is not required.
- You can also tell Blender where to put the addon using the "Custom Directory" toggle and path input field.
- We do not require an access token for this repository.
- Search for TrueVAULT if necessary and enable
- Sign in / Sign Up through the addon preferences or the side panel (N key) →
TrueVAULTtab. - Link SuperHive Purchases https://api.true-vfx.xyz/
- Search, purchase (if needed), Import.
- Done – asset appears in your scene / materials list.
- Preferred:
Edit > Preferences > Get Extensions→ Installed tab → if an update badge appears on TrueVAULT, click Update (or enable the global Auto-Update toggle so future versions install automatically). - If Auto-Update is enabled you just need to restart Blender when prompted (or the add-on hot-reloads).
- Manual fallback: re-drag-and-drop the extension and install again (Blender will overwrite).
- Existing local cached assets remain unless you clear them.
2. Open the Panel
- In a 3D View press N to open the Sidebar.
- Click the
TrueVAULTtab.
3. Sign In / Create Account 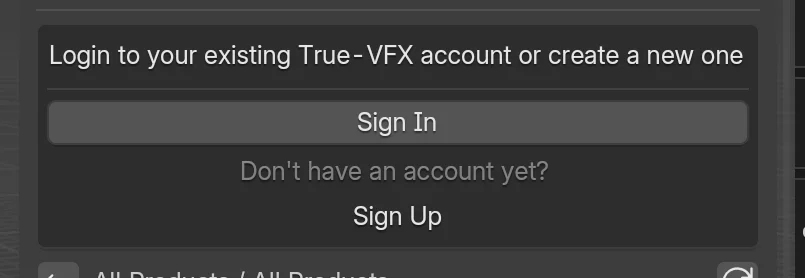 
You will see Sign In prompts if not authenticated.
- Click
Sign In. - Enter email and password.
- Complete email verification if prompted.
- Set Name and Username in the Account Settings.
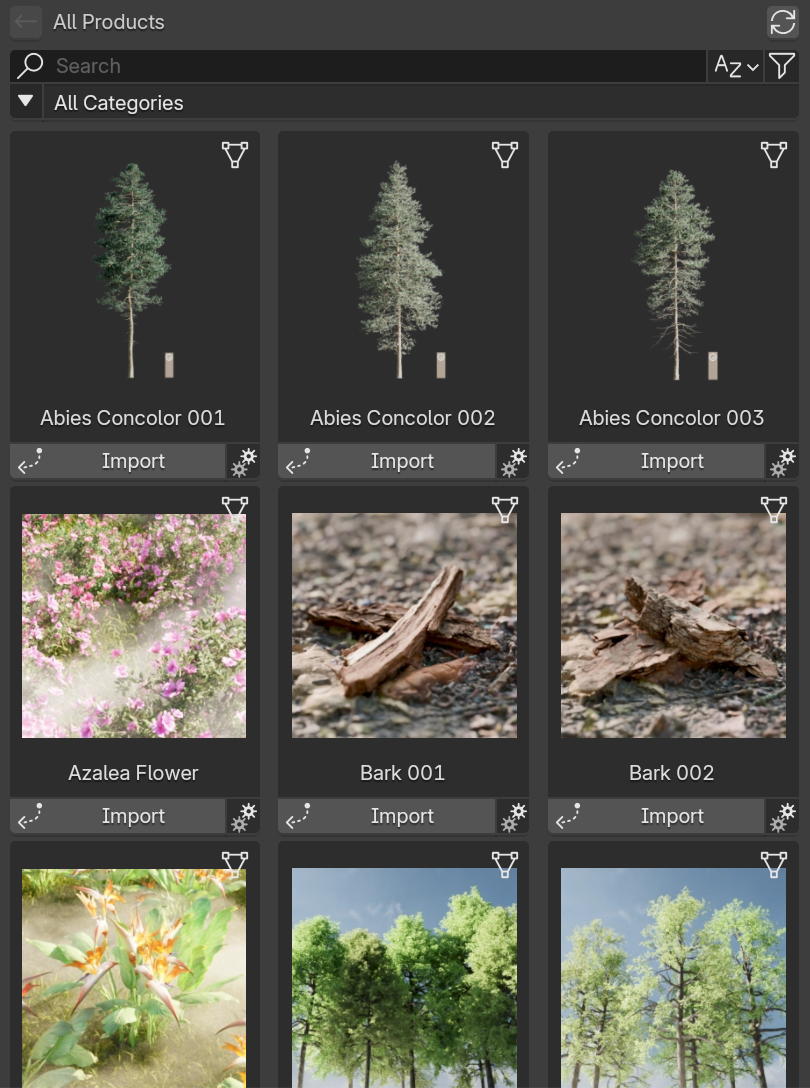
4. Browse
- Use the Search field () to find assets.
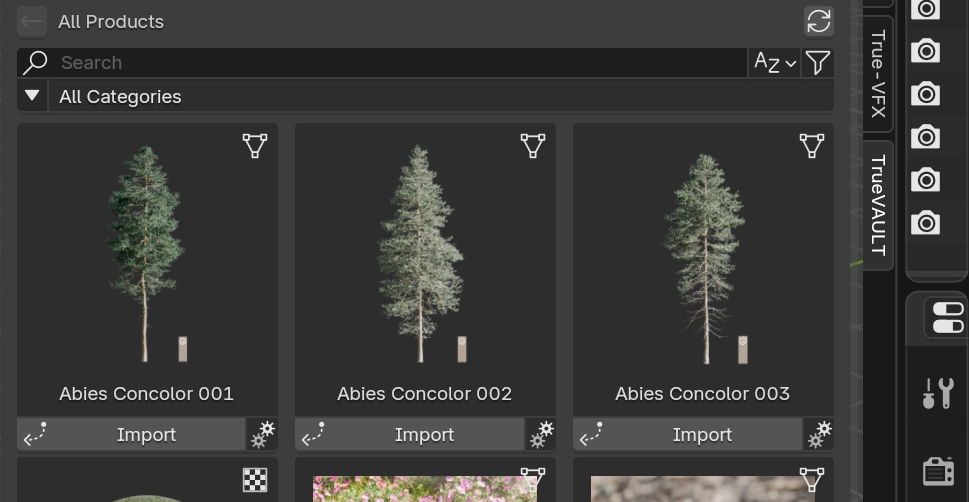
- Open Filters () for sort, price range, type, owned.
- Open Categories () to drill down by category path.
5. View Details
- Click a product title on its card.
- Explore gallery arrows / or dots to cycle images.
- Review Tags and License information.
6. Purchase (If Not Owned)
- Click Purchase.
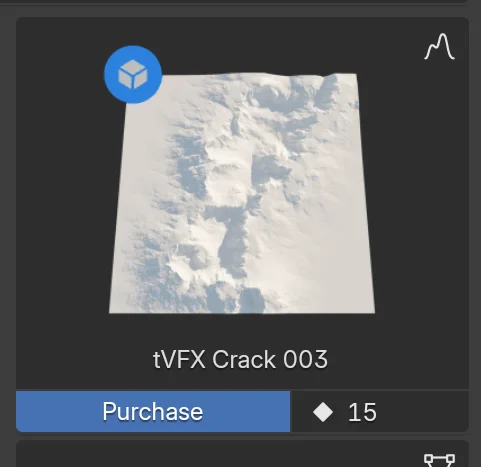
- Dialog shows credit price and your balance.
- If insufficient credits, click Recharge (opens web page) or Redeem Code.
- Confirm Purchase. Success message appears.
7. Import
- Owned asset shows an Import button.
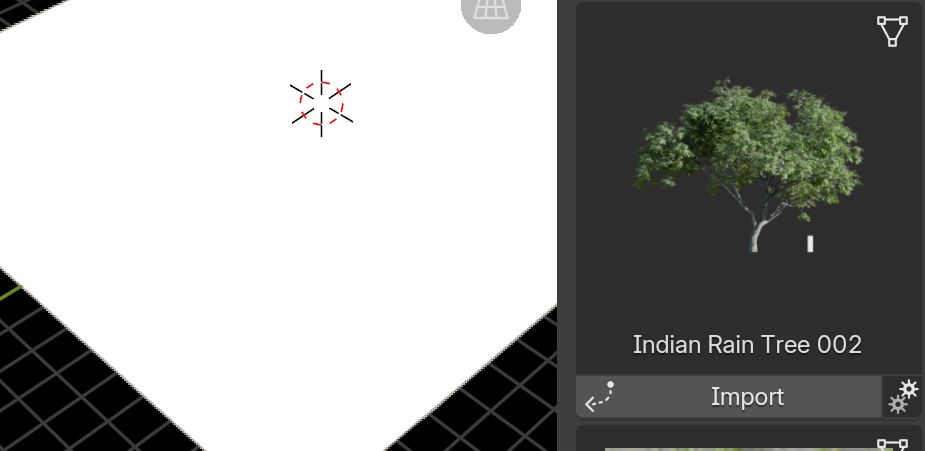
- Optionally click the gear icon to choose Version & Quality .
- Click Import.
- Placement:
- Objects: Click in the viewport to place.
- Textures: select objects first to auto-apply material.
- Height Maps: a geometry nodes setup is created.
- Wait for download progress (press ESC to Cancel).
8. Verify
- Imported objects appear in the active collection.
- Materials appear in the Material list if texture asset.
- Height Map object with Geometry Nodes modifier if height map asset.
Troubleshooting
Can't see the TrueVAULT tab?
- Ensure the add-on is enabled in Preferences.
- Try toggling it off/on.
- Check Console for errors (
Window > Toggle System Console).
Drag & Drop install not working?
- Use the Manual (Zip File) tab above.
- Verify Blender version ≥ target: 4.5+.
Import stalled at 0%?
- Check internet connection / firewall.
- Re‑sign in if token expired (look for auth prompt).
- Use smaller quality variant via gear icon .